In this lesson we’re going to take a look at IP SLA (Service-Level Agreement) within Cisco devices and how it can be utilized.
4.0 Network Assurance
4.5 Configure and verify IPSLA
IP SLA is a tool that’s built into Cisco IOS devices that allows us to monitor network performance and collect valuable information.
The IP SLA tool does this by sending self-created traffic to the device we want to monitor and then records the results.

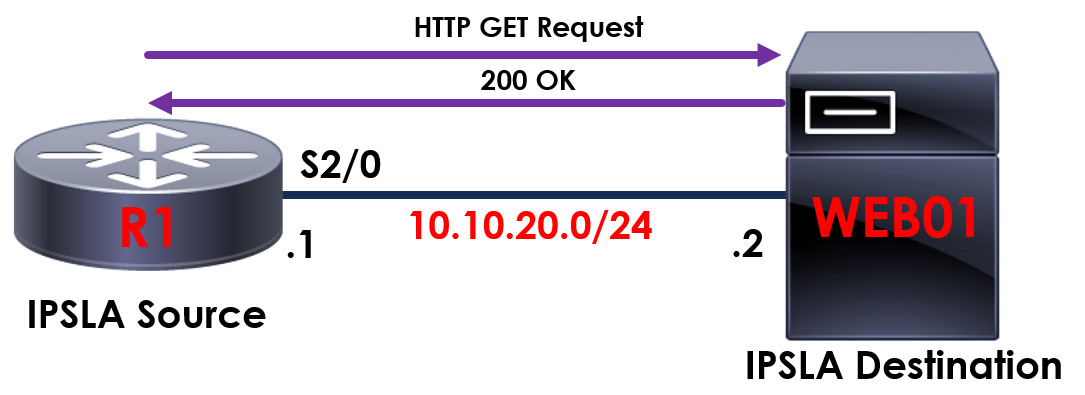
To provide some context on how this works, take a look at our example above.
In the example we’re taking advantage of IP SLA on R1 to send continual HTTP requests to WEB01. This then allows us to monitor and confirm that our web page hosted on WEB01 is online and loading correctly.
Already, you can see the benefits that IP SLA provides, however let’s take this a step further and start to take a look at the real power IP SLA provides.
One of the fantastic benefits of IP SLA is the ability to combine it with routing protocols.

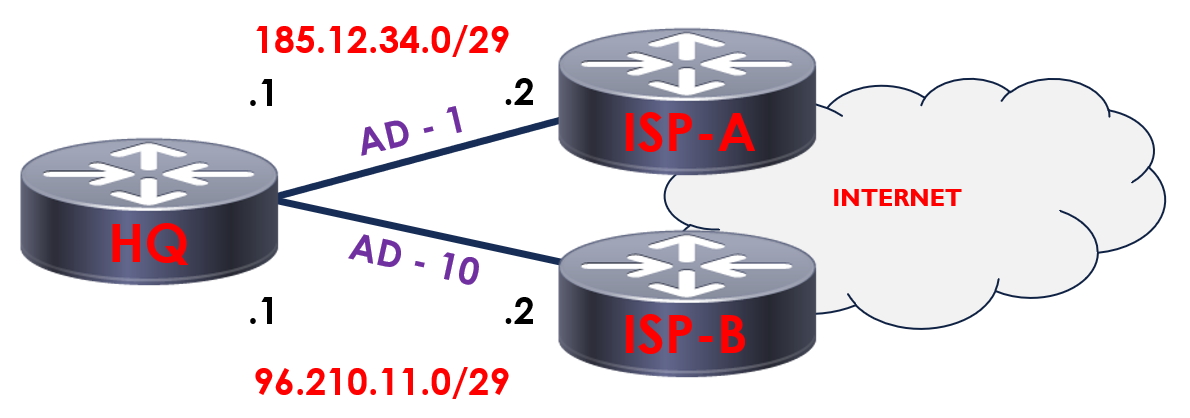
Here you can see SITE_A connected to two different internet providers – ISP1 and ISP2.
By default, all traffic destined for the internet routes via ISP1. In the event ISP1 is unavailable, traffic is then routed via ISP2.
This is achieved by amending the advertised distance (AD) of our routes. ISP1 has a lower AD (1) than ISP2 (10). Due to this, ISP1 is used as the primary route unless our interface to ISP1 is down, then traffic routes via ISP2.
This is great, however what happens if our interface connected to ISP1 doesn’t go down but our ISP is experiencing issues? Our route to ISP1 will remain in the routing table, therefore traffic will not automatically failover to ISP2.
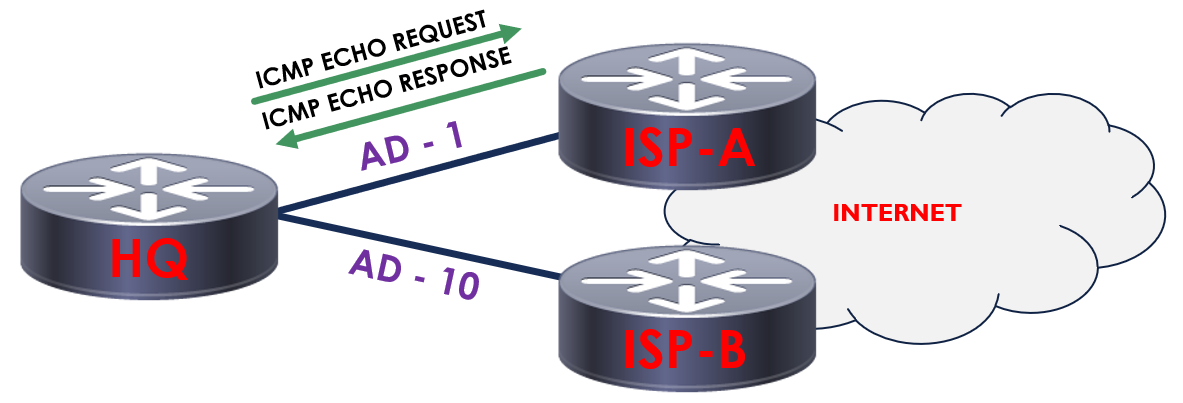
With the power of IP SLA, we have the ability to resolve this by running a continual ping to ISP1 at the remote end of our point-to-point connection.

In our example, SITE_A is now using IP SLA to generate and send continual ping requests to ISP1. As long as we’re still getting a response from ISP1, we will continue to use this as our default route.
In the event that we no longer get a response from ISP1, we can then automatically switch over to ISP2 using a tracking object.
We have a number of probes that can be used to continuously monitor and collect vital network information.